


Browse Every Blog, post, picture, and video Casey has made.
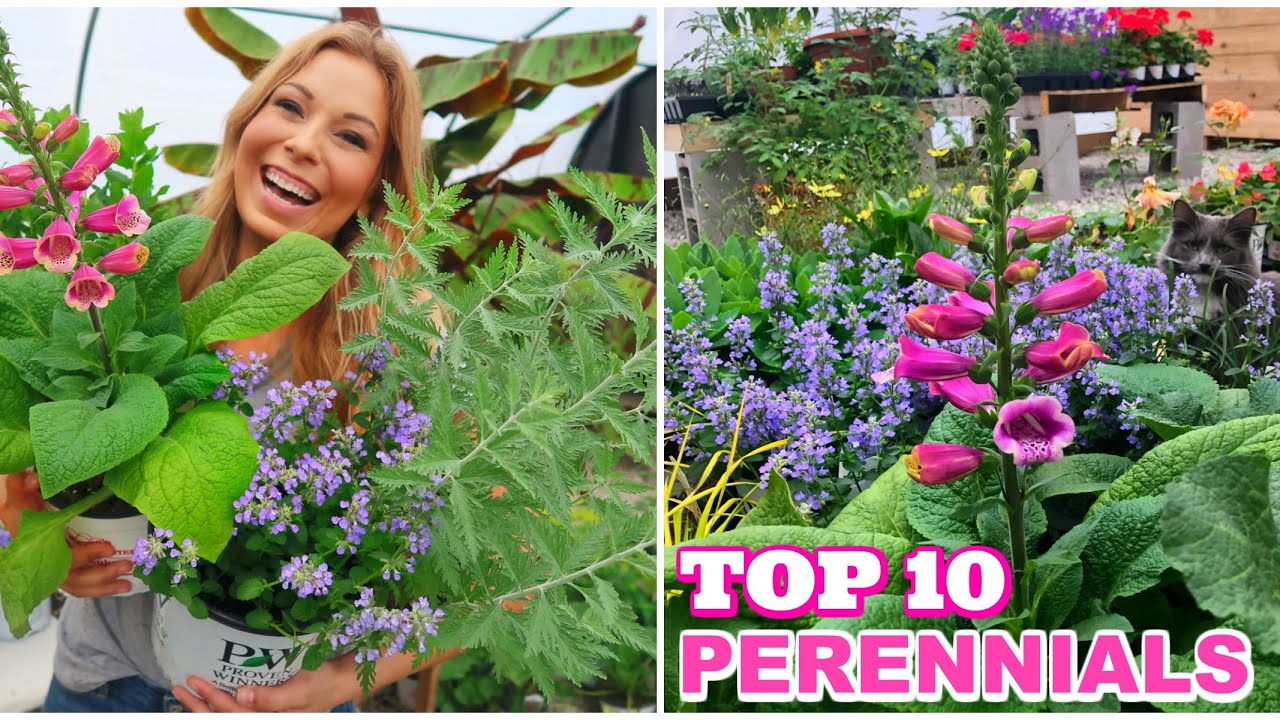
Our Top 10 Favorite Perennials
Inspiration For Your Perennial Gardens
In this blog we’re going to discuss our Top 10 Favorite Perennials. We’re excited to share information with you including size, zone, sunlight, and what each perennial may attract to your garden. We hope you’ll be inspired by our list of favorites and maybe you’ll even find a new perennial that you absolutely love and have to have for your garden!
Products In This Video
1. Catmint
The first perennial we are going to discuss is Catmint. Called ‘Cat’s Pajamas’, the name of the perennial is super fun and the flowers are absolutely gorgeous! It’s another beautiful perennial by Proven Winners. Cat’s Pajamas get 12 to 14 inches in size and it’s hardy in zones 3 – 8. It blooms from late spring into late fall, so pretty much all season, and takes full Sun. The Catmint pairs very well with the next perennial on our list of Top Favorites too.

2. Pearlwort
Number two on our list of favorites is Pearlwort, a type of Irish Moss. Pearlwort pairs well with Catmint because the Catmint is a little bit taller and the Pearlwort is more like a ground cover. So it’s really cool to see the blue flowers from the Catmint intermixed with the green texture of Pearlwort on the ground. Don’t forget, though, the Pearlwort also gets flowers! It blooms in summer with small, little white flowers. Pearlwort also works great in little fairy gardens. It takes full sun to part sun and does very well in zones 4 – 8.
3. Bonfire
If you’ve been watching our Youtube Channel for a while, then you know I’m a sucker for colored foliage; and the next perennial on our list is a great one. A type of Euphorbia, this perennial is called Bonfire and can take sun to part shade. It’s great for perennial bed borders because it only gets about 10 inches tall. It does well in zones 4 – 9.
4. Coreopsis
The next perennial I’m going to share with you is loved by many perennial gardeners – it’s Coreopsis. Coreopsis is the Moonbeam. It can take full sun and can actually be very drought tolerant. We absolutely love this one because it gives us that beautiful yellow daisy flower all summer, pretty much up until fall. They get 18 to 24 inches and they do very well in zones 4 – 9.
Coreopsis can take full to part sun, as long as they’re getting at least six hours of sun a day. Another great feature about the Coreopsis is that it’s deer resistant. If you have problems with deer, coreopsis would be a great perennial to add into your garden.
5. Agastache Morello
Another great perennial that is deer resistant is Agastache Morello. It gets these beautiful reddish pink flowers and attracts butterflies and hummingbirds to the garden, so it’s a great addition. They bloom all summer long. It loves full sun and gets 27 to 33 inches. Agastache Morello does very well in zones 5 – 10.

6. Foxglove
We just had an amazing Foxglove blossom in our greenhouse (pictured to the left). This gorgeous variety is called Candy Mountain. What we love about Foxglove isn’t just the beauty that it brings to the garden, but it’s height as well. The Candy Mountain Foxglove can get 3 – 4 feet tall. It blooms in early summer and it can take full sun to part sun. It grows well in zones 4 – 9.
A good thing to know about Foxglove is that they are biennial. So after two years, they die off. But Foxglove do recede, so you’re sure to continue to have Foxglove even though the main plant will die off.
7. Russian Sage
Seventh on our List of Perennial Favorites is Russian Sage. Not only does it give us beautiful foliage and beautiful blue flowers, it also gives us a beautiful scent in the garden. Russian Sage is popular because it’s a staple to most country-style gardens and it’s also super hardy. It does well in zones 4 – 9. Russian Sage does well in sun and part sun, and it can get three to four feet.
8. Double Blue Balloon Flower
The next perennial we’re going to talk about is the Double Blue Balloon Flower. The perennial in our video below may not be in blossom, but when it is, it’s very hard to miss it in the garden. The Double Blue Balloon Flower can take sun to part sun and it gets about two feet tall. It blooms in midsummer and grows very well in zones 3 – 8, so it’s a super hardy perennial.
9. Milkweed
Now we’re going to talk about Milkweed. We feature Swamp Milkweed in our video below. If you don’t want anything taking over your garden, then this is not the perennial for you. Swamp milkweed is pretty invasive and it can just keep spreading throughout your garden. So if you have a really well manicured, structured garden, Swamp Milkweed would not be a great addition.
We love attracting wildlife pollinators and beneficials into our gardens, so this year we really wanted to add Milkweed. Especially because we’re hoping to entice more butterflies. We’ve got a few Swamp Milkweed plants and a designated space that will allow them to go wild and multiply over the years.
Swamp Milkweed gets beautiful pink flowers from midsummer to early fall. They can get three to five feet tall in the garden and do very well in zones 3 – 9, so it’s a very hardy perennial.
10. Cardinal Flower
Last but not least on our list is the Cardinal Flower. Surprisingly, we’ve never grown it in our gardens before. So we’re super excited to add this into our gardens this year. It’s supposed to be a great perennial that attracts hummingbirds and butterflies. The Cardinal Flower gets really beautiful, vibrant red spikes of flowers late in the season; which is nice when we’re not getting as much color. It can get three to four feet tall and does well in zones 3 – 9. It can take full sun to part sun. We are very excited to pair the Cardinal Flower with all the other beautiful perennials that we have selected this year for our new perennial garden.
Thank You for Reading!
We hope you’ve enjoyed our blog! We’re eager to add these10 beautiful perennials to our garden this year. If you’re interested in seeing the plants we discussed above in more detail, watch the video below. You can also visit our Youtube Channel for more gardening videos & tips.
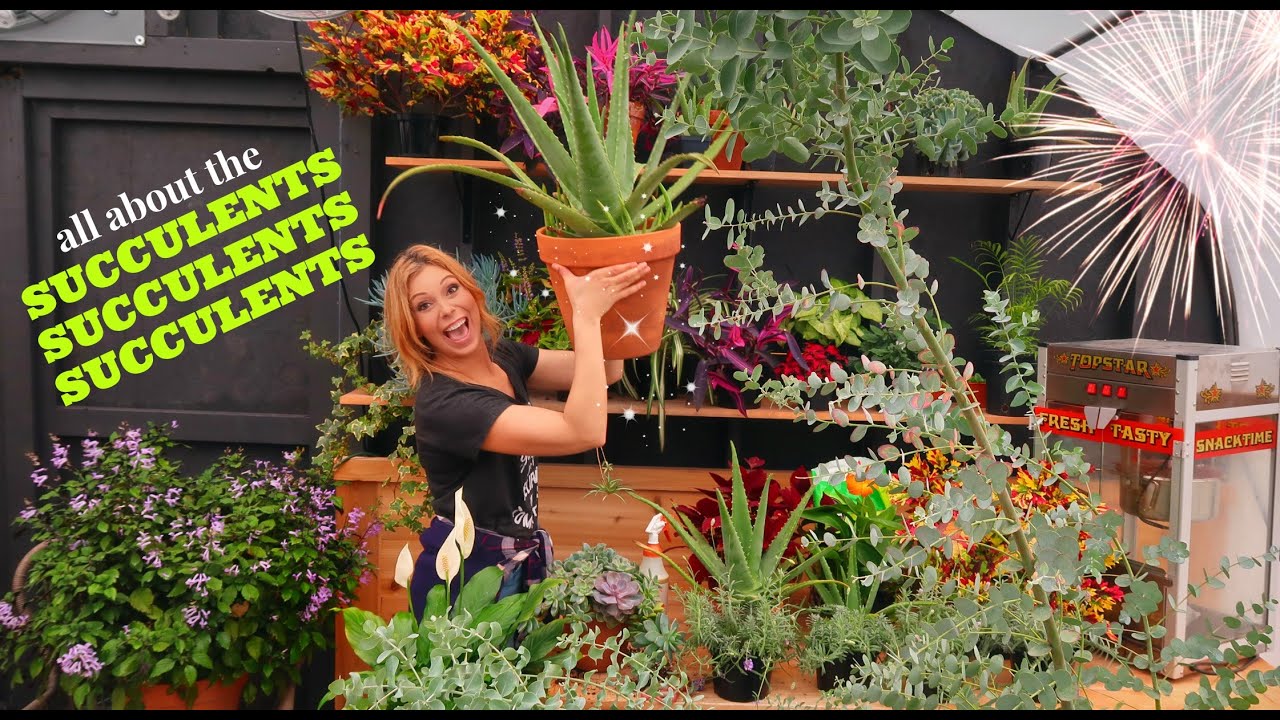
All About Succulents
Everything Succulents
Make the Most of Your Succulents with These Quick & Easy Tips
Below I’m going to walk you through, step by step, everything you need to know about growing succulents – from starting new succulent containers to treating mealybugs to duplicating succulents and more. Check out the video below for extra details and to see examples of the steps below. Let’s get started!
1. Quick & Easy Succulent Containers
For these super easy succulent containers, you need 4” plastic pots, succulent soil, water, and succulent cuttings. First, fill the pots up with soil. Wet down the soil. Take the succulent cuttings (I just snip tips right off of my larger succulents) and stick them into the soil. That’s it! In the video, you’ll see just how quick this process was and how well the succulents have rooted.

2. Checking for Mealy Bugs
A lot of mealy bugs like to hang out underneath succulents where they can hide. Start your inspection at the base. You should also look in between the succulents, along the stems, and around the leaves.
The spray treatment we mix ourselves is a combination of Trifecta Crop Control and Neem Oil & Soap. We alternate between this mixture and Monterey. Both are safe to use in organic gardening.
When you find mealybugs, you want to really wet them until you see some of the whiteness move a little bit. This is important because you want to get the spray underneath the mealybugs not just on top. If you find mealybugs in one spot of your succulent, they are likely hiding elsewhere as well. In this case, you can spray in the hidden crevices between and underneath the succulents as a precaution. You should also remove any dead leaves that have fallen because they are another spot mealybugs like to hide. Take an extra hard look at succulents with long stems. Mealybugs can start going into the stem of your plant and will need to be thoroughly sprayed down.
3. Duplicating Succulents
When you’re checking and treating your succulents for mealybugs, leaves are bound to fall off. Those leaves can be used to grow new succulents! Simply rinse them and lay them out in the bright sun. They will start growing a root from the bottom of the leaf. Alternatively, you can lay the leaves right on top of the soil, where they will root right into the soil and create a whole new succulent.
Another way to multiple your succulents is to cut off a small head from the top of your plant and place it in a new pot of soil. If you have a large succulent that is dying from mealy bugs, you can cut off all of the good parts, clean them up (really spray them down with some Neem Oil), and place them in new pots.
4. The Big Aloe
The aloe plant featured in our video is quite interesting. It lasted two years in our basement without being watered. When we rescued this plant, it had so many babies. More than it has even now. To remove the babies, I removed the big aloe plant from its pot and took a large, sharp kitchen knife and cut the babies off of the mama’s roots. After separating them, I planted the baby aloe plants into 3 ½” pots. I used the Professional Grower’s Mix by Jolly Gardener and that’s it.
Something to note: the more room an aloe plant has to grow, the larger it will get.
5. Bumping Up Succulents
When you’re ready to grow bigger succulents, its time to replant them in a larger pot. Prepare a new pot by filling it halfway up with soil. Remove your small succulent from its pot and check it for leaves that have fallen off (some may begin to take root in the soil). Those leaves can all become new succulents if planted.
Before planting the succulent in your new pot, I like to add a little extra Perlite. We’re going to mix that into the bottom real nice until it lightens up the soil a little bit more for these succulents. We do this because succulent roots are a lot finer. Place your succulent in the new pot and fill the soil to the top, mixing in a little extra Perlite as you go. If leaves fall off, keep them to grow new succulents.
6. The Miracle of Succulent Leaves
For starting succulents, I like to use a 72 cell plug flat. I make sure the soil is nice and wet. Then, when they’re just leaves, you simply place them on top of the soil and give them a little push to nudge them into the soil just a little bit. If the leaves are really small, you can put two leaves together in one plug. It’s that easy!
I have so much fun playing with succulents and hope you’ve gotten good tips and good ideas from this post and our video. Now you’re ready to get succulents started on your own!
Check out our YouTube Channel for more gardening videos.
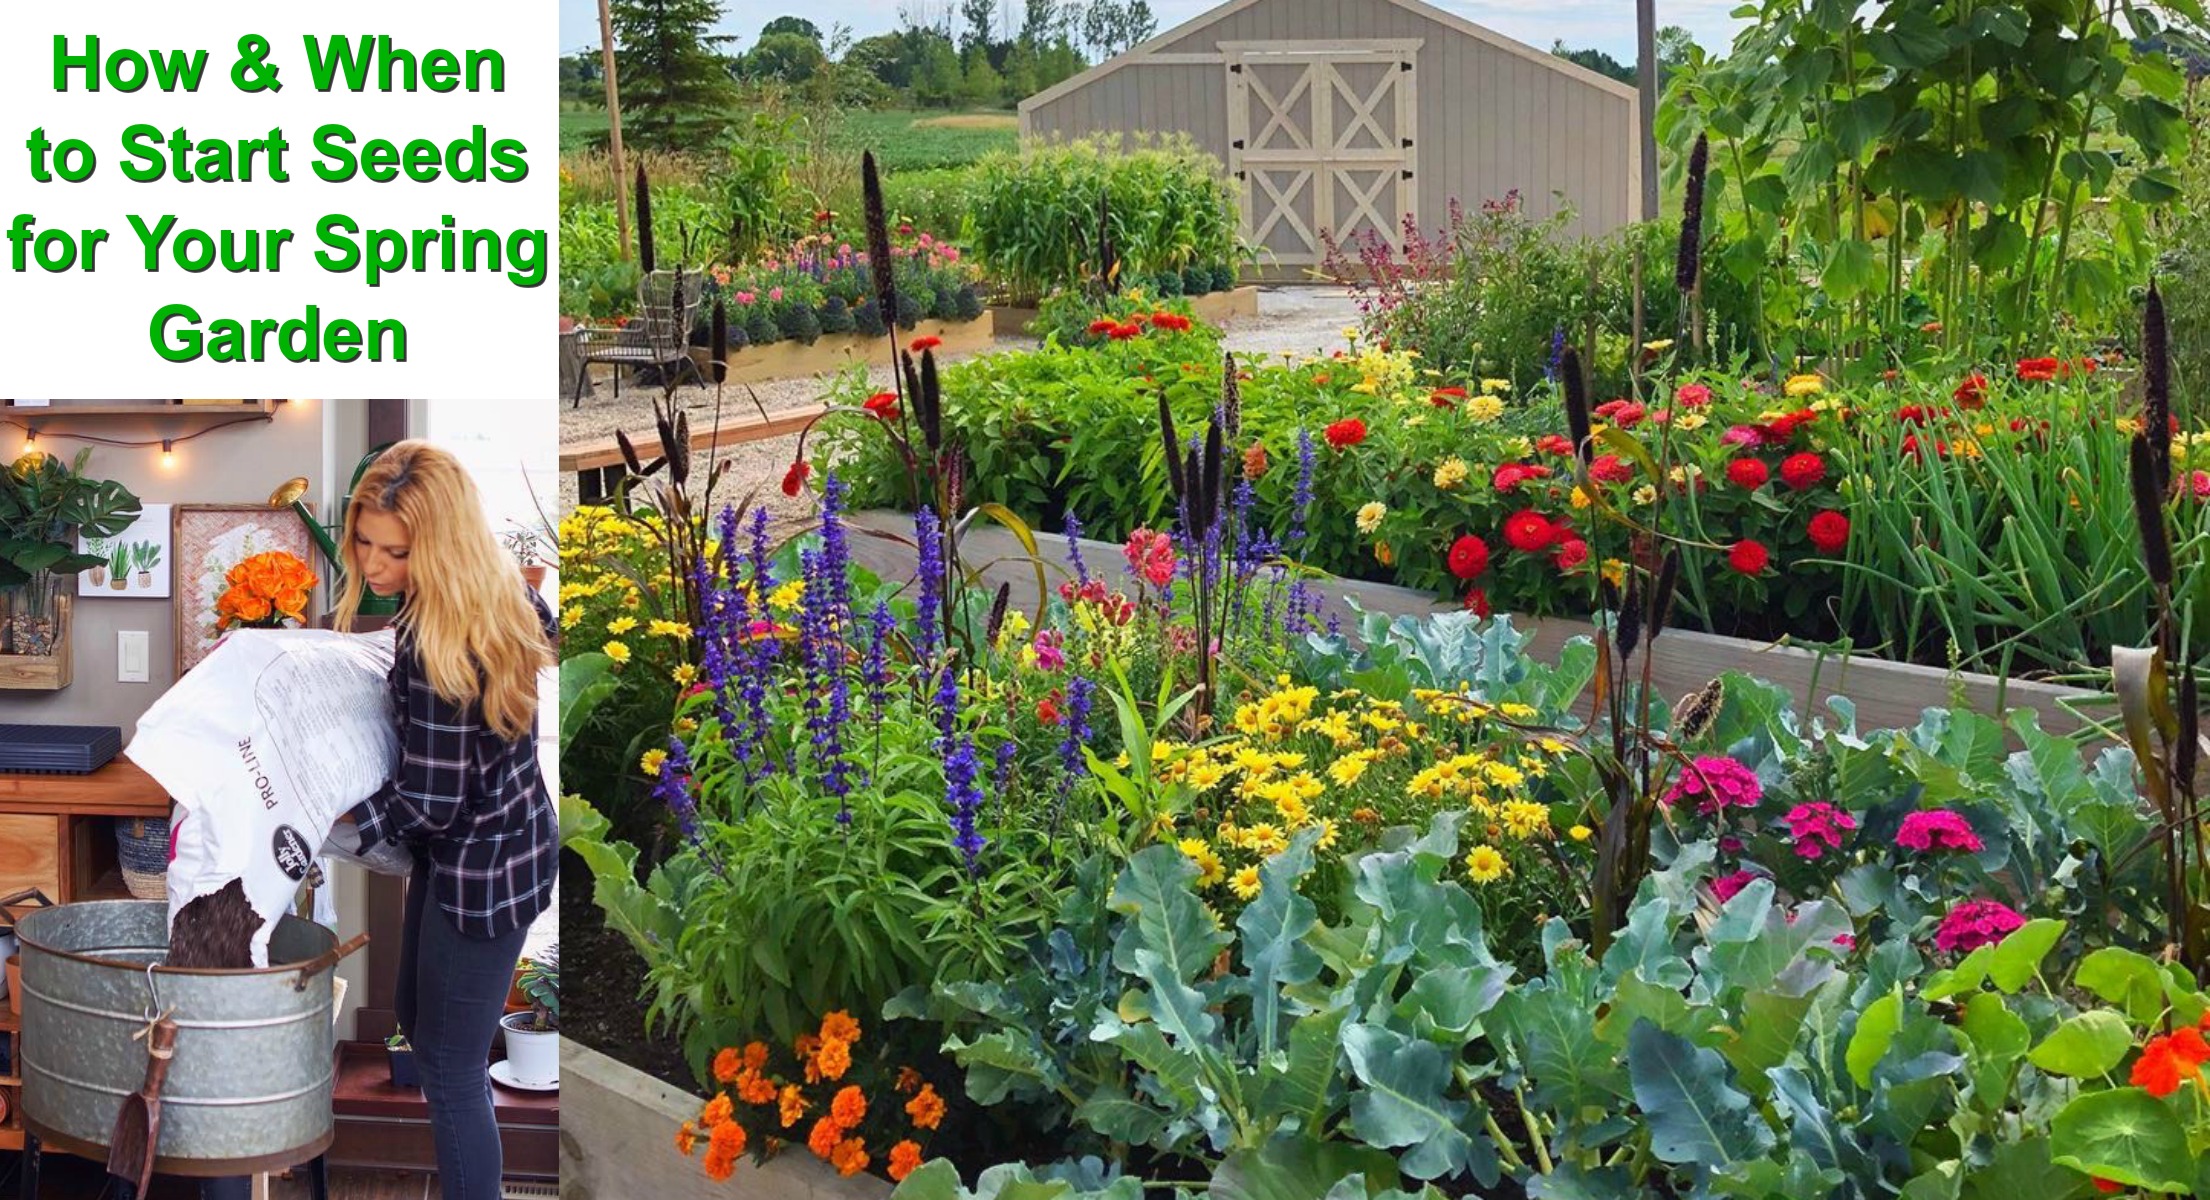
How and When To Start Seeding Indoors
How And When To Start Seeding Indoors
How and When to Start Seeding Indoors.
Everything I talk about below is shown in the video below this post, so you can see each step in detail.
There isn’t just One Right way to do this, for example, I prefer to put my seeds into dry soil and then water. Others prefer to start with wet soil and then put the seed in. As long as it grows, they were both the Right Way! I’ll share here what works for me.
I start seeding most of our varieties mid March through early February. Most seed packets will say how many weeks to plant prior to the last frost you will have.
I use seedling trays, which you can through Amazon, https://amzn.to/2u5Pf7U I do cut these trays down in size and I’ll share why down below. I then fill them with a seeding soil, I personally use and love Jolly Gardener seeding soil, but I can only ever get it at my parents garden center, you can but this at big box stores or online, so you can also use other available seeding soils. Miracle grow has a seeding soil (here’s a link for it https://amzn.to/2G7FwB7 , Sungrow is another one, there are many.
I then will pour out the seed packet onto a white tray or plate, so I can see them all. The back of the seed packet will have instructions on how to put the seeds into the soil and whether or not they like to be covered, ect.. So make sure to read the back of the packet. If the seed doesn’t need to be covered I will drop one seed on top of the soil at each cell. If it says to cover, then I would poke a little hole into the soil and drop the seed in.
I then like to sprinkle a little vermiculite on top of the soil, this helps to hold and retain the moisture, the cell won’t dry out as quickly. I don’t completely cover the soil, just lightly sprinkle it on. This is something my Dad does, he’s a farmer and owner of Wayne’s Daughters Greenhouses and is their head seeder, so any tips he gives me, I will take! This has been the one trick that has helped my seedlings germinate well.
Now, it’s time to water. I like to use the spray hose from my sink and I turn the water on low, I want to very lightly water it but I want to soak the dirt all the way through. If you water with too much force, it will blow the seed and vermiculate right out of the soil. So make sure to lightly run the spray over and you can do it a couple times so it soaks the soil all the way through. Then I let it sit so any excess water can drip out.
I then place the tray inside a 1 gallon ziplock bag. Now above I talked about cutting the trays, this is why I do it. So that it fits inside the ziplock bag. I will then place the tray inside the ziplock bag, but don’t close it all the way. You do want air to be able to get inside. I will also poke a few holes in the bag to allow for more air circulation. I then prop up the plastic with a couple tooth pic so the plastic isn’t sitting directly on top of the tray. This acts like a mini Greenhouse!
I place the bag with tray in a sunny and warm spot. A south-side window or now into our Greenhouse we built over the summer! You definitely have to keep an eye on it, once you see the plastic start to condensate, that is good, but you don’t want it to create to many large water droplets that start to fall on the tray, if you see those start to form, them make sure enough air is getting into the bag, you can open it up a little more.
Then I’ll lable my seedling tray but writing on a piece of painters tape what it is, I wrap that around another tooth pic and stick it in the tray.
Once the seedlings start to pop out of the soil and are sticking out of the soil by 1/8″ – 1/4″ you can take the tray out of the ziplock bag.
That is how I germinate my seeds! I hope this will help you with your seeding adventure. You can check out our YouTube Channel for more video’s. In our Garden and Recipes Playlist there will be another video showing the next steps.
Happy Seeding!!
3 Tips To Have A beautiful Fall Garden
3 Tips To Maintain A Beautiful Fall Garden
Photographed. Filmed. Created by:
Tip 1. You guessed it!, well maybe. If you know me you know I love to fertilize. Fertilizing my Flowering containers with Jack’s Bloom Booster Fertilizer. Here is the link if you would like to try it https://amzn.to/2Izyneh
This time of year they are really rooted into their containers so they need extra nutrients. I am fertilizing weekly and have been for some time. When I water, I always water underneath the flowers and foliage. This way it keeps them looking nice and bushy on top, not matted down. Oh and always make sure your containers have holes in the bottom for water to drain.
Tip 2. Then after watering, I will pull/pick any bad leaves or dead flowers to make the container look vibrant with color. This one is such a huge reason your gardens will look amazing through the fall. Picking away any of the brown leaves and dead flowers leaves green foliage and colorful flowers.
Tip 3. Next for our bug and worm problems on certain plants, I will use Organic Monterey to spray the plants. Here is the link if you would like to try it out https://amzn.to/30h0ji9
This will keep the leaves on your plants, especially flower kale from not being eaten away.
Well those are my 3 tips for fall garden maintenance and keeping your fall gardens looking amazing!
How to Duplicate Succulents
How to Duplicate Succulents
Photographed. Filmed. Created by:
Lets learn how to Duplicate your succulents, it’s easy! There are a lot of ways to do this, I’ll talk about my way.
There are tons of different kinds of succulents and when it comes to propagating or duplicating there are the kind you can just pull the leaf off of and then there is the kind you will need to take a cutting off of. In the video I’ll show an up close on exactly how to do this!
After watching this you will be ready to Duplicate your own succulents! Good Luck!
For any questions you can reach me on Instagram @caseylynnlawrence
How to Plant a Window Box – Detailed Lesson
How to Plant a Window Box – Detailed Lesson
Photographed. Filmed. Created by: